For the majority of my life I have typically been broke at Christmas!
This has led me to become creative and original in my avenues for gift giving. Basically I’ve been hot gluing my damn fingers together since FOREVER.
Over the next few days I’m going to share some of my projects that have been more successful, meaningful and a little more budget friendly. This project is a DIY patchwork camo jacket to execute with friends, family and with just enough wine possibly a child.

The idea is you give the jacket and patches as a gift for you to complete as a team project with your kids, friends or family.

Patch work jackets are very much on trend so this is a project you can actually wear and not be embarrassed of the end product!

Let me explain the inspiration behind my jacket and then we will walk step by step through how I completed it.
All of the patches used I ordered from Etsy and will provide links below.
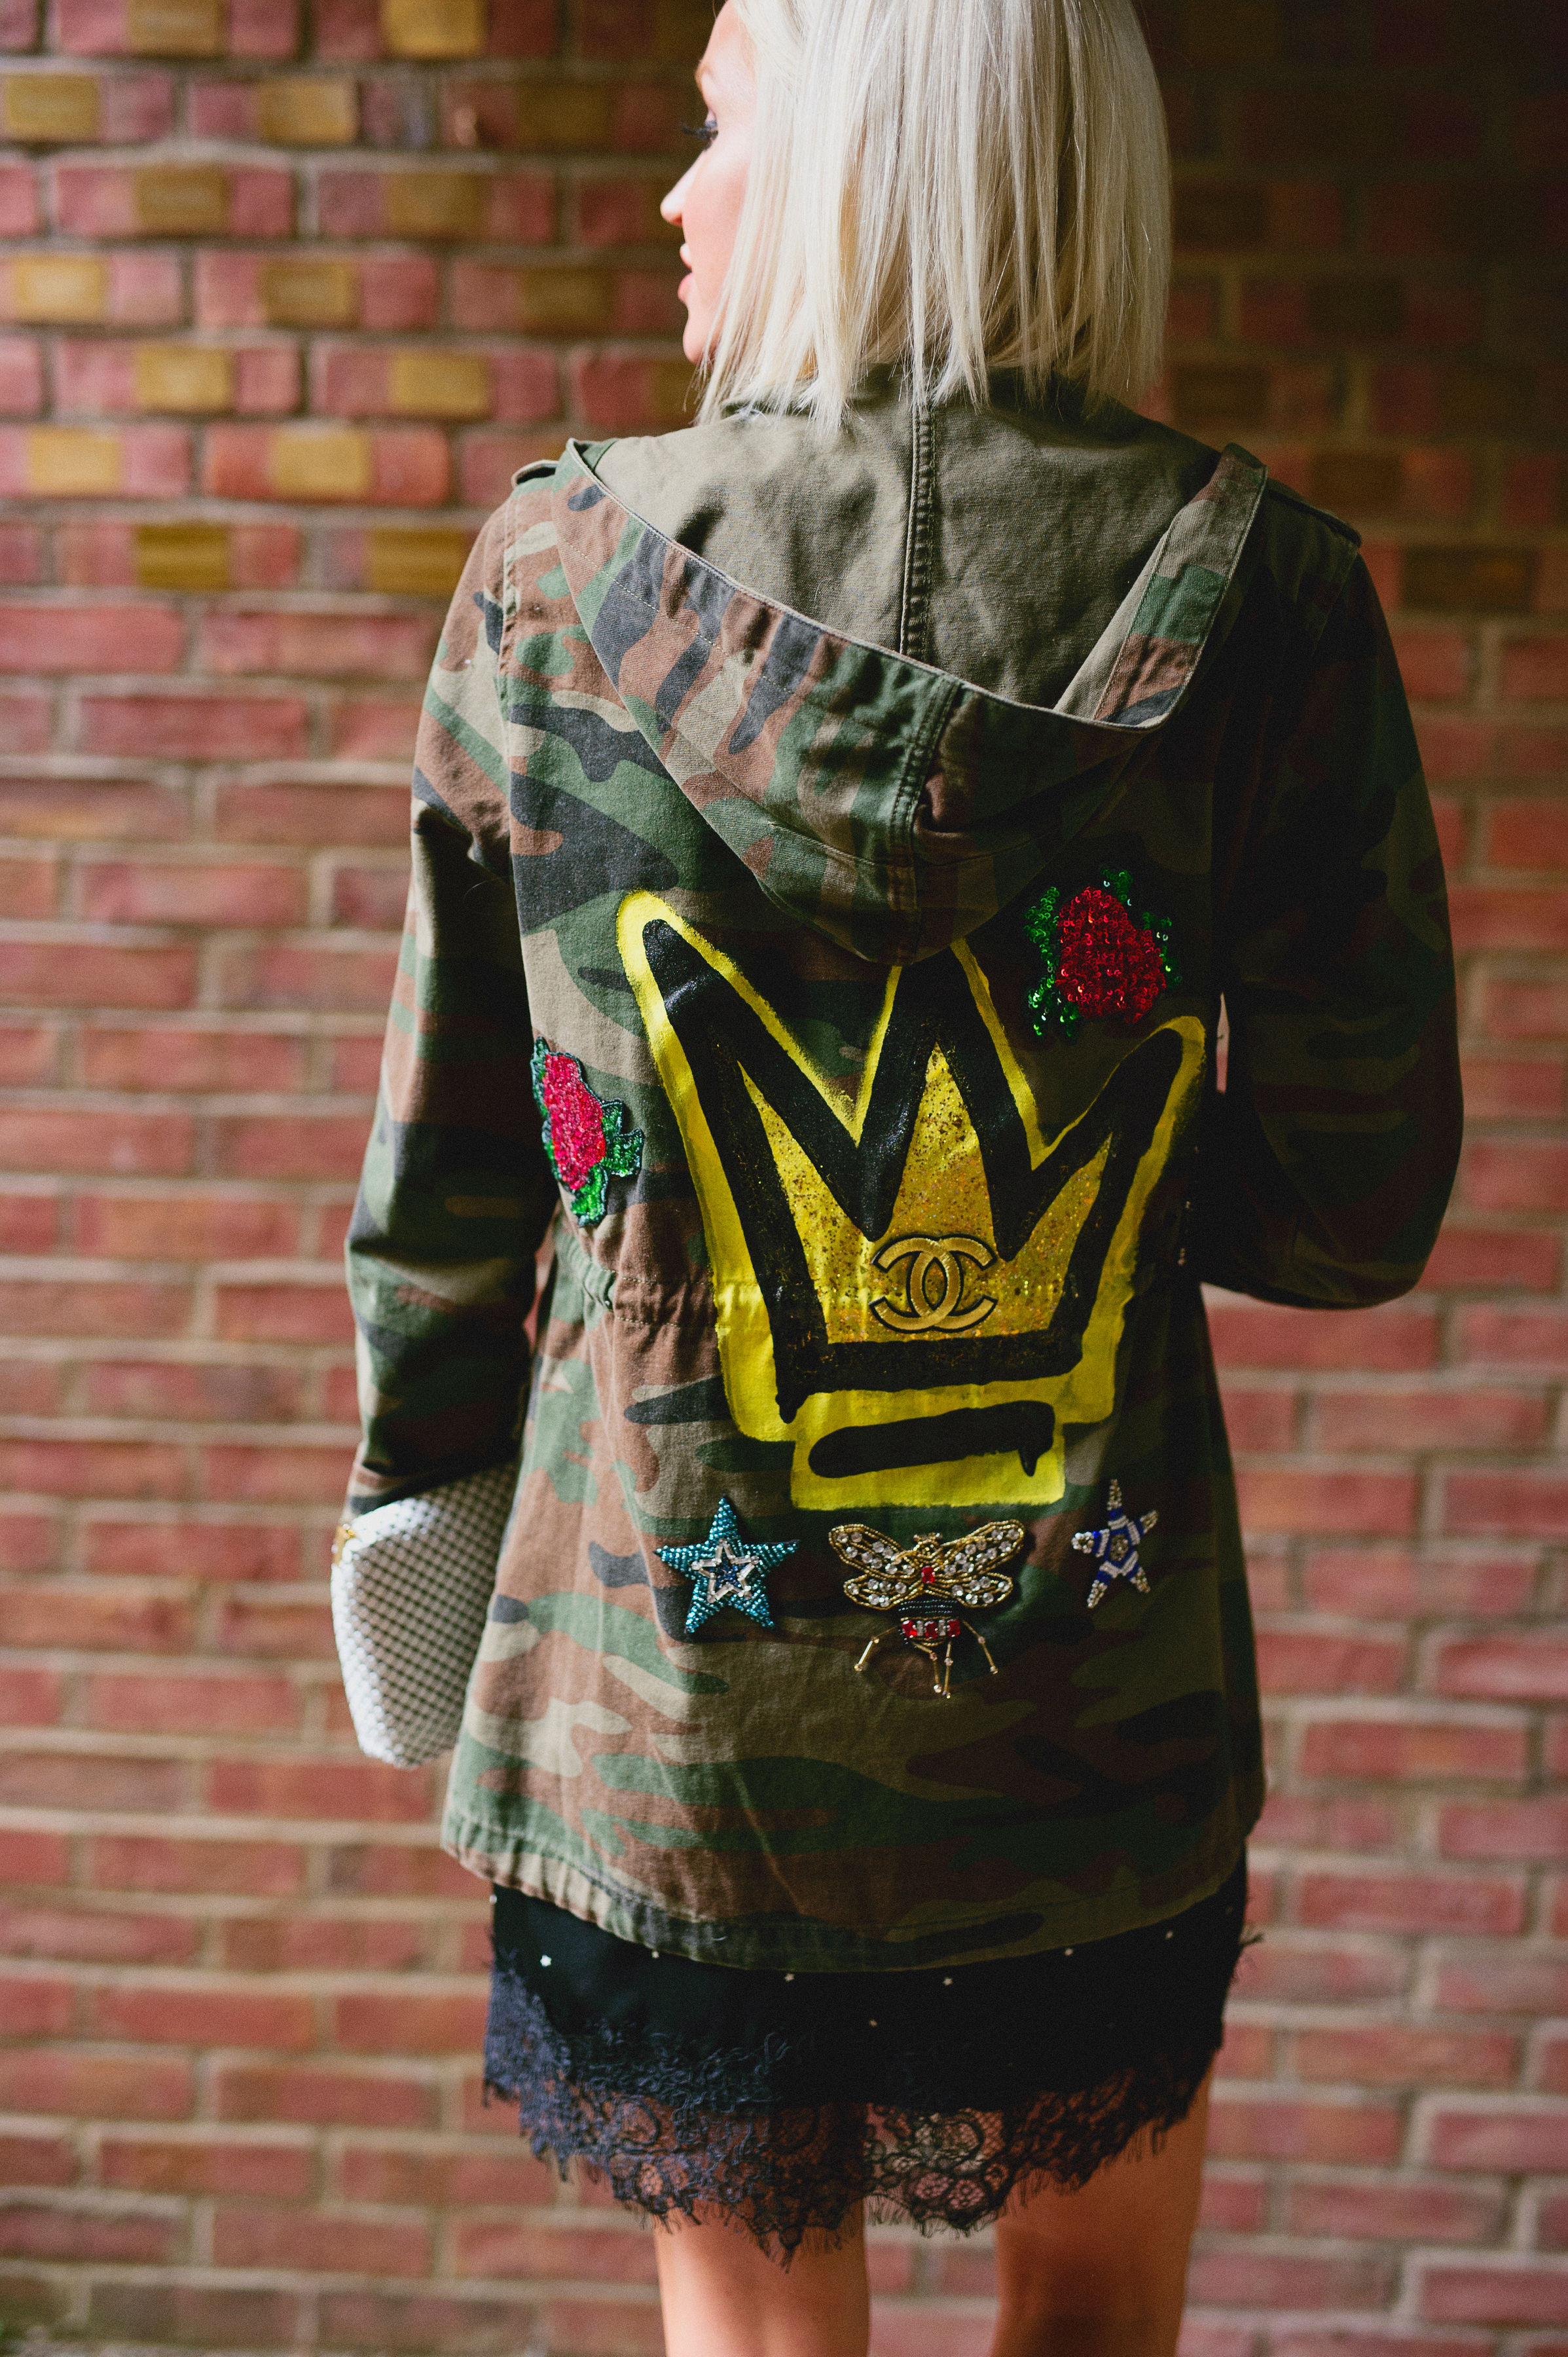
Going into this project I knew I wanted to incorporate some sort of “crown” symbol in a graffiti style. I google searched some different options and painted the crown on myself.
Sidenote: I was a TOTAL art geek growing up. I attended Gateway during the summers for years. I really wish I had stuck with it and participated in the Governor’s School.

When I was in 5th grade my art teacher, Carrie Powers, showcased all my artwork throughout my time at East Aiken Elementary in a hallway display.
I remember this morning because my Dad always took me to school on Friday’s. (He worked 4/10’s.) At the time he had a Jeep, which obviously I wanted to ride to school in WITHOUT the doors on; BUT I knew this would ruin my bangs. So I sacrificed a messy side swoop for my picture on this day, because it was absolutely necessary I roll up in the car line with my little right foot hanging out the side of that Jeep.
ALSO, my mom made me put a jacket on and I was like, MOM I only have this red wind breaker and YOU CAN’T WEAR PINK WITH RED!?!?! So there probably was some sort of meltdown over my jacket collection not being shit.


My art page in my scrapbook.
The next section in my scrapbook is dedicated to my forehead.
WHY IS IT SO BIG IN THESE PICTURES?!
Back to the jacket!!!

The jacket I used is from Forever21.
I wanted to go for a more oversized fit, which could easily be found at a thrift store or Goodwill if you have time to dedicate to the search.
The last jacket I just linked is currently $14!!! It comes in an olive and navy and even if you don’t use it for this project it’s great everyday jacket to have on hand. The navy color is currently in my cart to purchase!!
I hung the jacket and made a mark with a white eyeliner pencil where the hood falls.
This allows me to know how much of the back is visible when I’m wearing the jacket and the hood is in it’s normal resting position.

I had a variety of patches on hand all from Etsy.
The tiger face patches I have been using for some Gameday Clemson projects.
Some patches come in a group and the price range differs, it’s up to you how much you want to invest in this project!
If you decide to involve children in the project I probably would stick to just letting them point to where they want the patches to go and glue those suckers down! On this particular day I felt I had enough patience to deal with myself and painting so I went all in.
The first image is the result of my search for “graffiti crown”. I screenshot it and kept in on hand for reference when sketching it out onto the back of the jacket.
The second photo I measured the width of the jacket to center up where I would begin sketching the base of the crown. Again, I used white eyeliner to sketch out the crown. It can easily be wiped off with a rag if you make mistakes.
I used acrylic paint from Michael’s. I painted the yellow outline of the crown first and then filled it in to a solid finish. After letting that dry I went back with a sharpie to sketch the black outline of the crown.
BEFORE, I traced that sharpie outline with black paint I filled in the inside of the outline with gold glitter. I really liked the glitter paint I used, it had chunks and flakes of gold in it which really catch the light. When that was dry I traced the sharpie outline with black paint to make the line thicker. I also made the paint very thick in the area’s I wanted the “drip” effect. When I hung the jacket to dry I kind of shook the jacket in those places to encourage the drip process.


I’m SUPER glad I marked where the hood came down on the back of the jacket because if I had not done that, I probably would’ve painted the crown much higher.
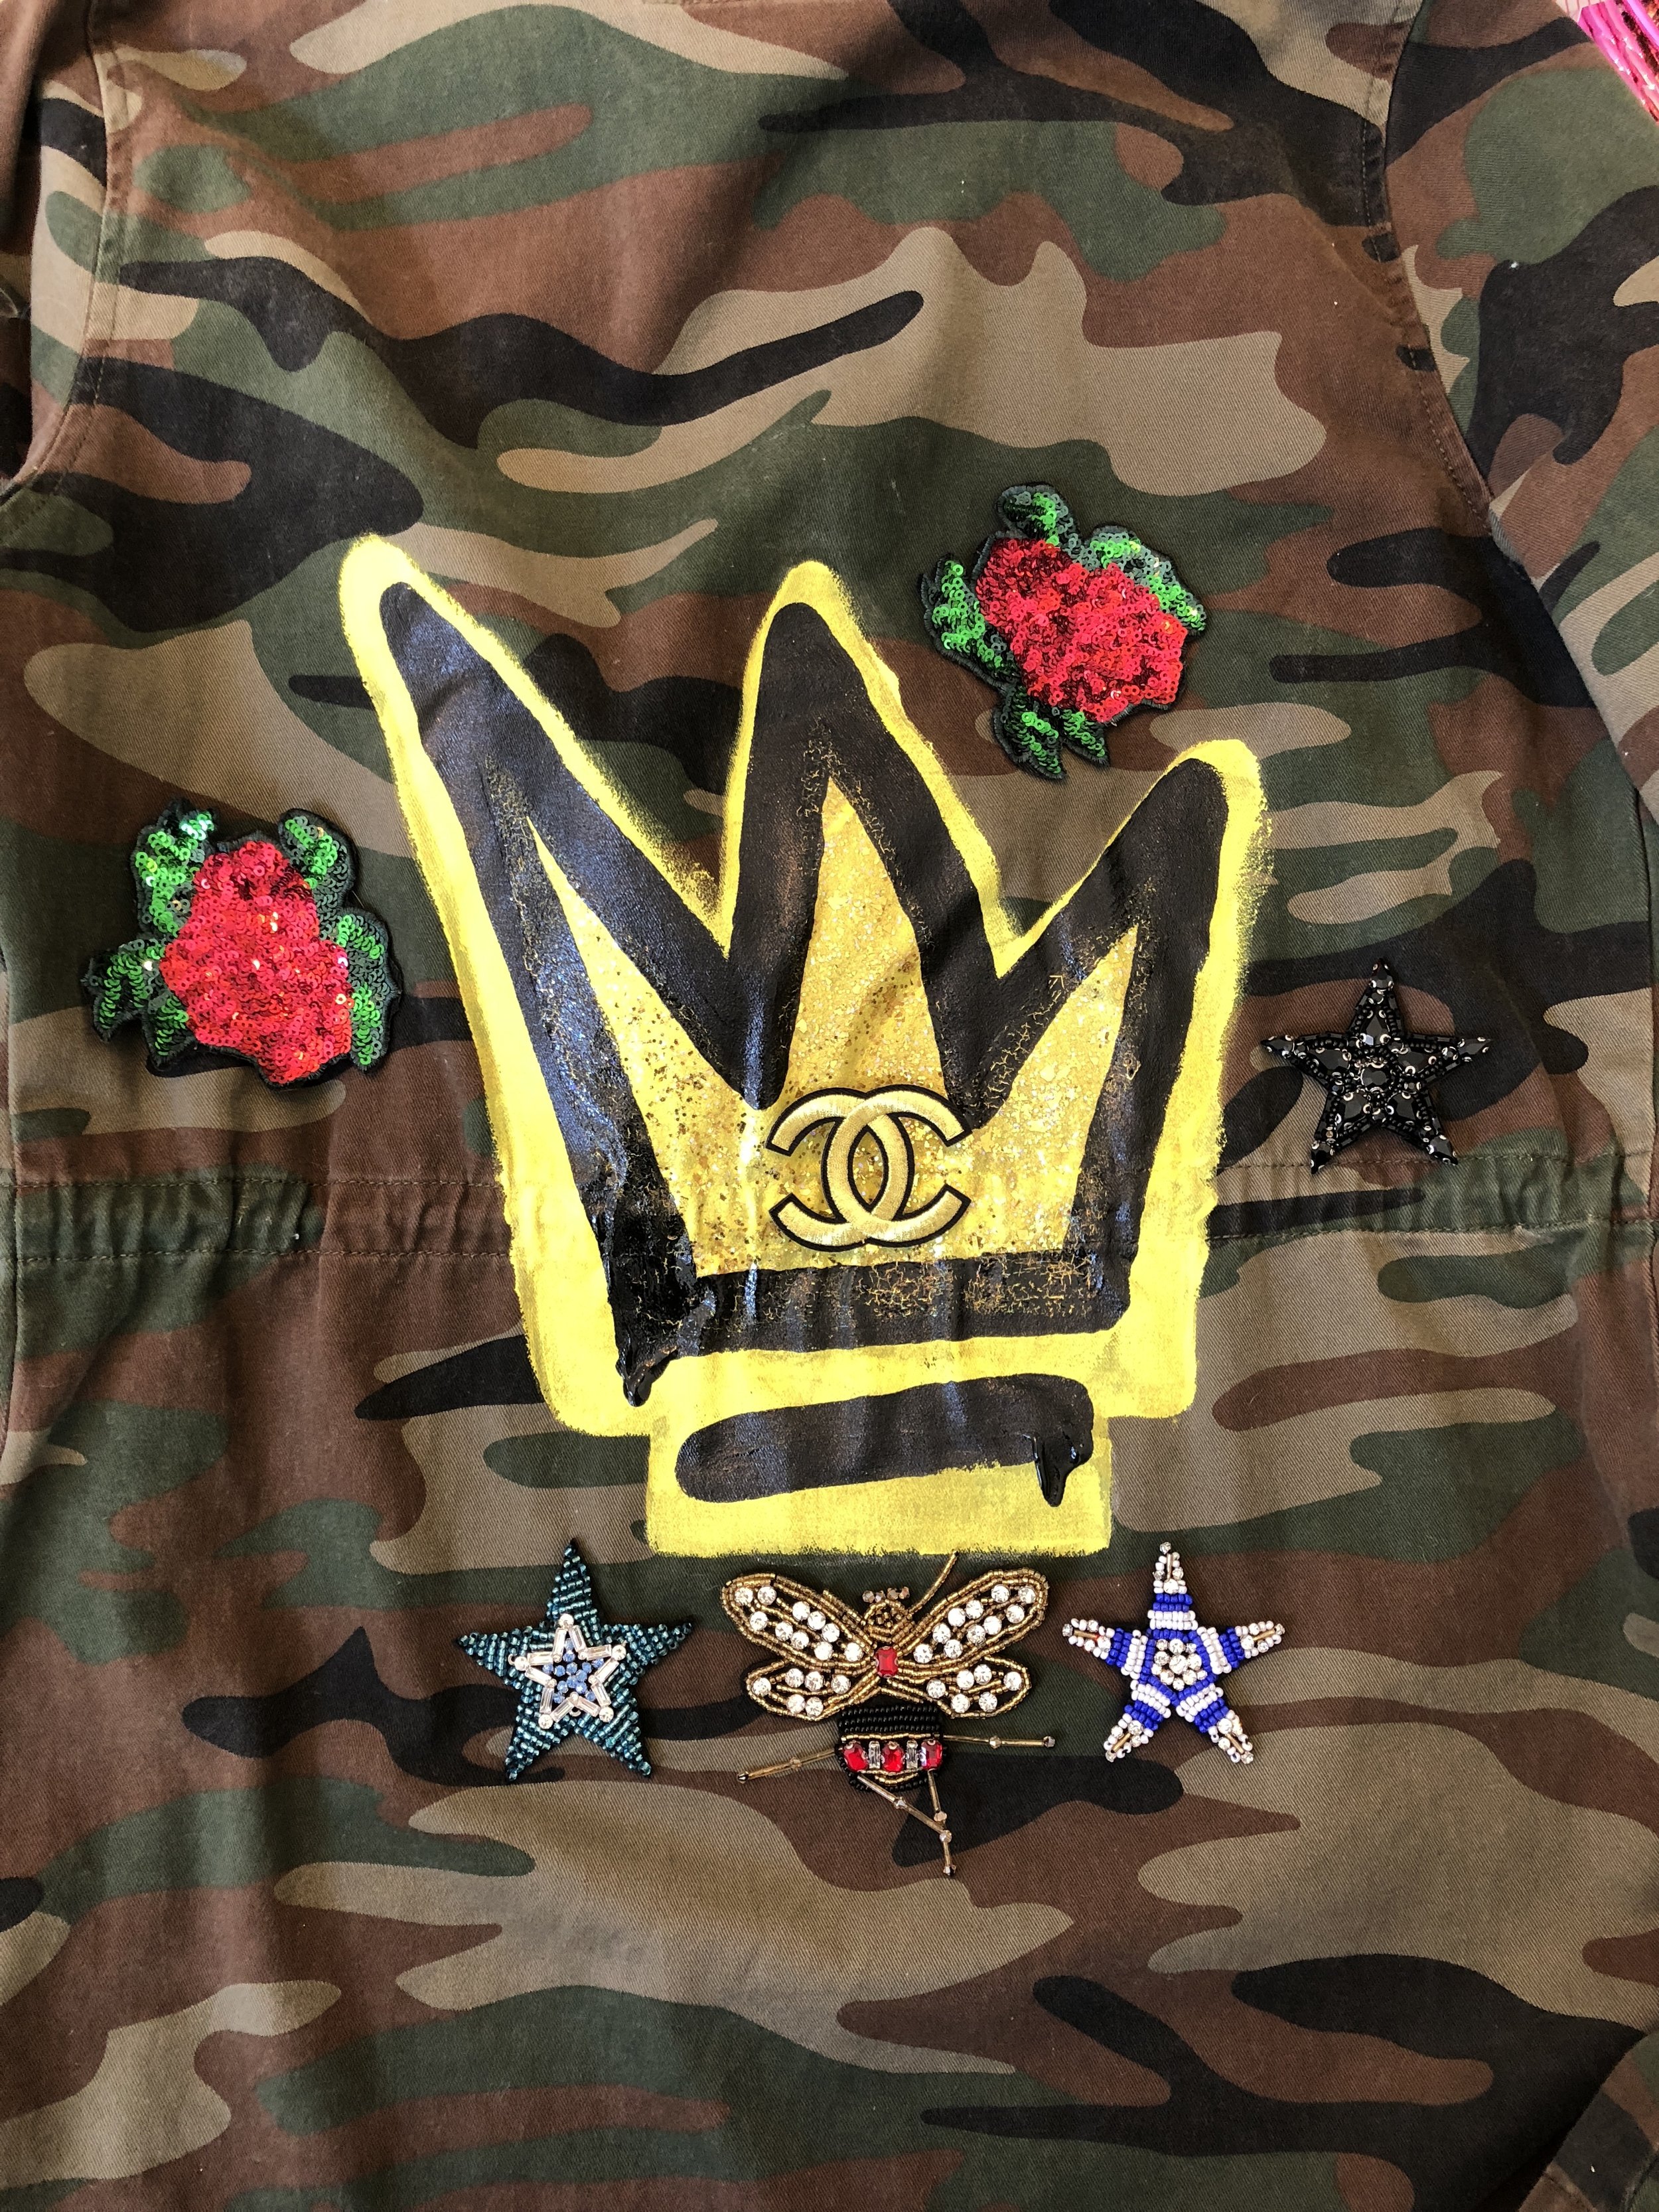
When the paint dried I played around with the placement of the patches before gluing them down.
I used E6000 and placed a few heavy books on top of the patches for extra security to dry over night.

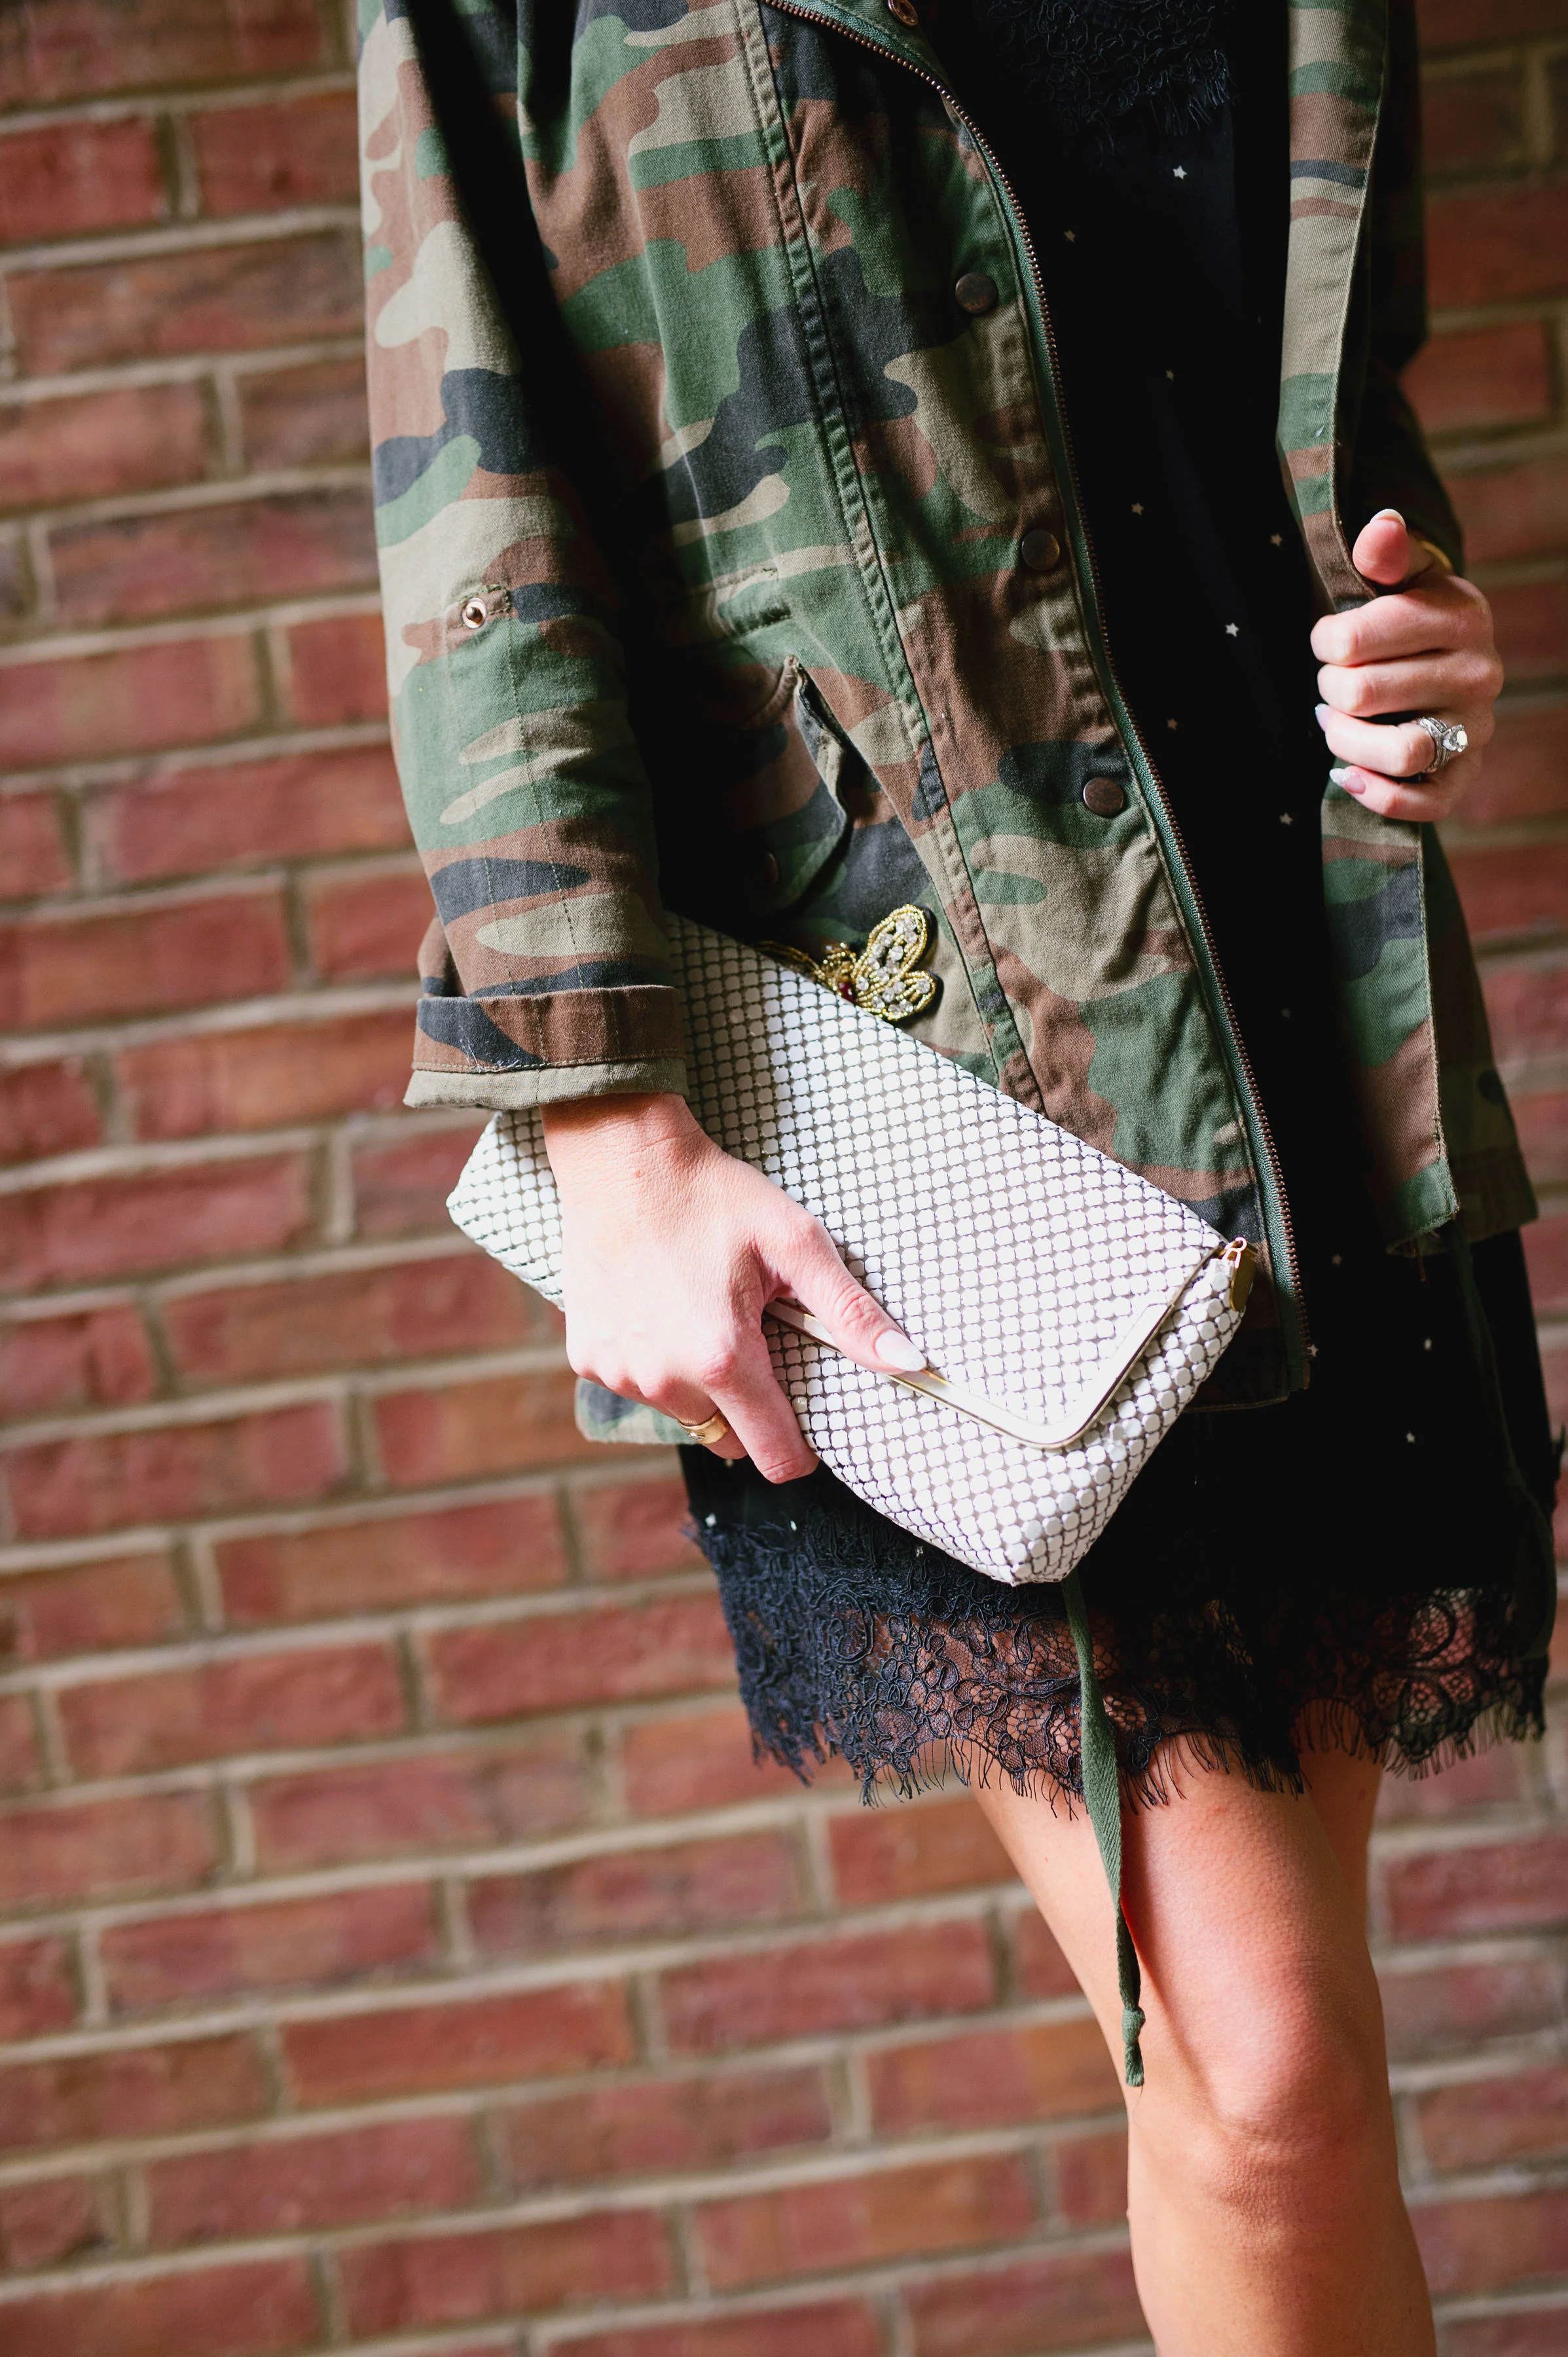
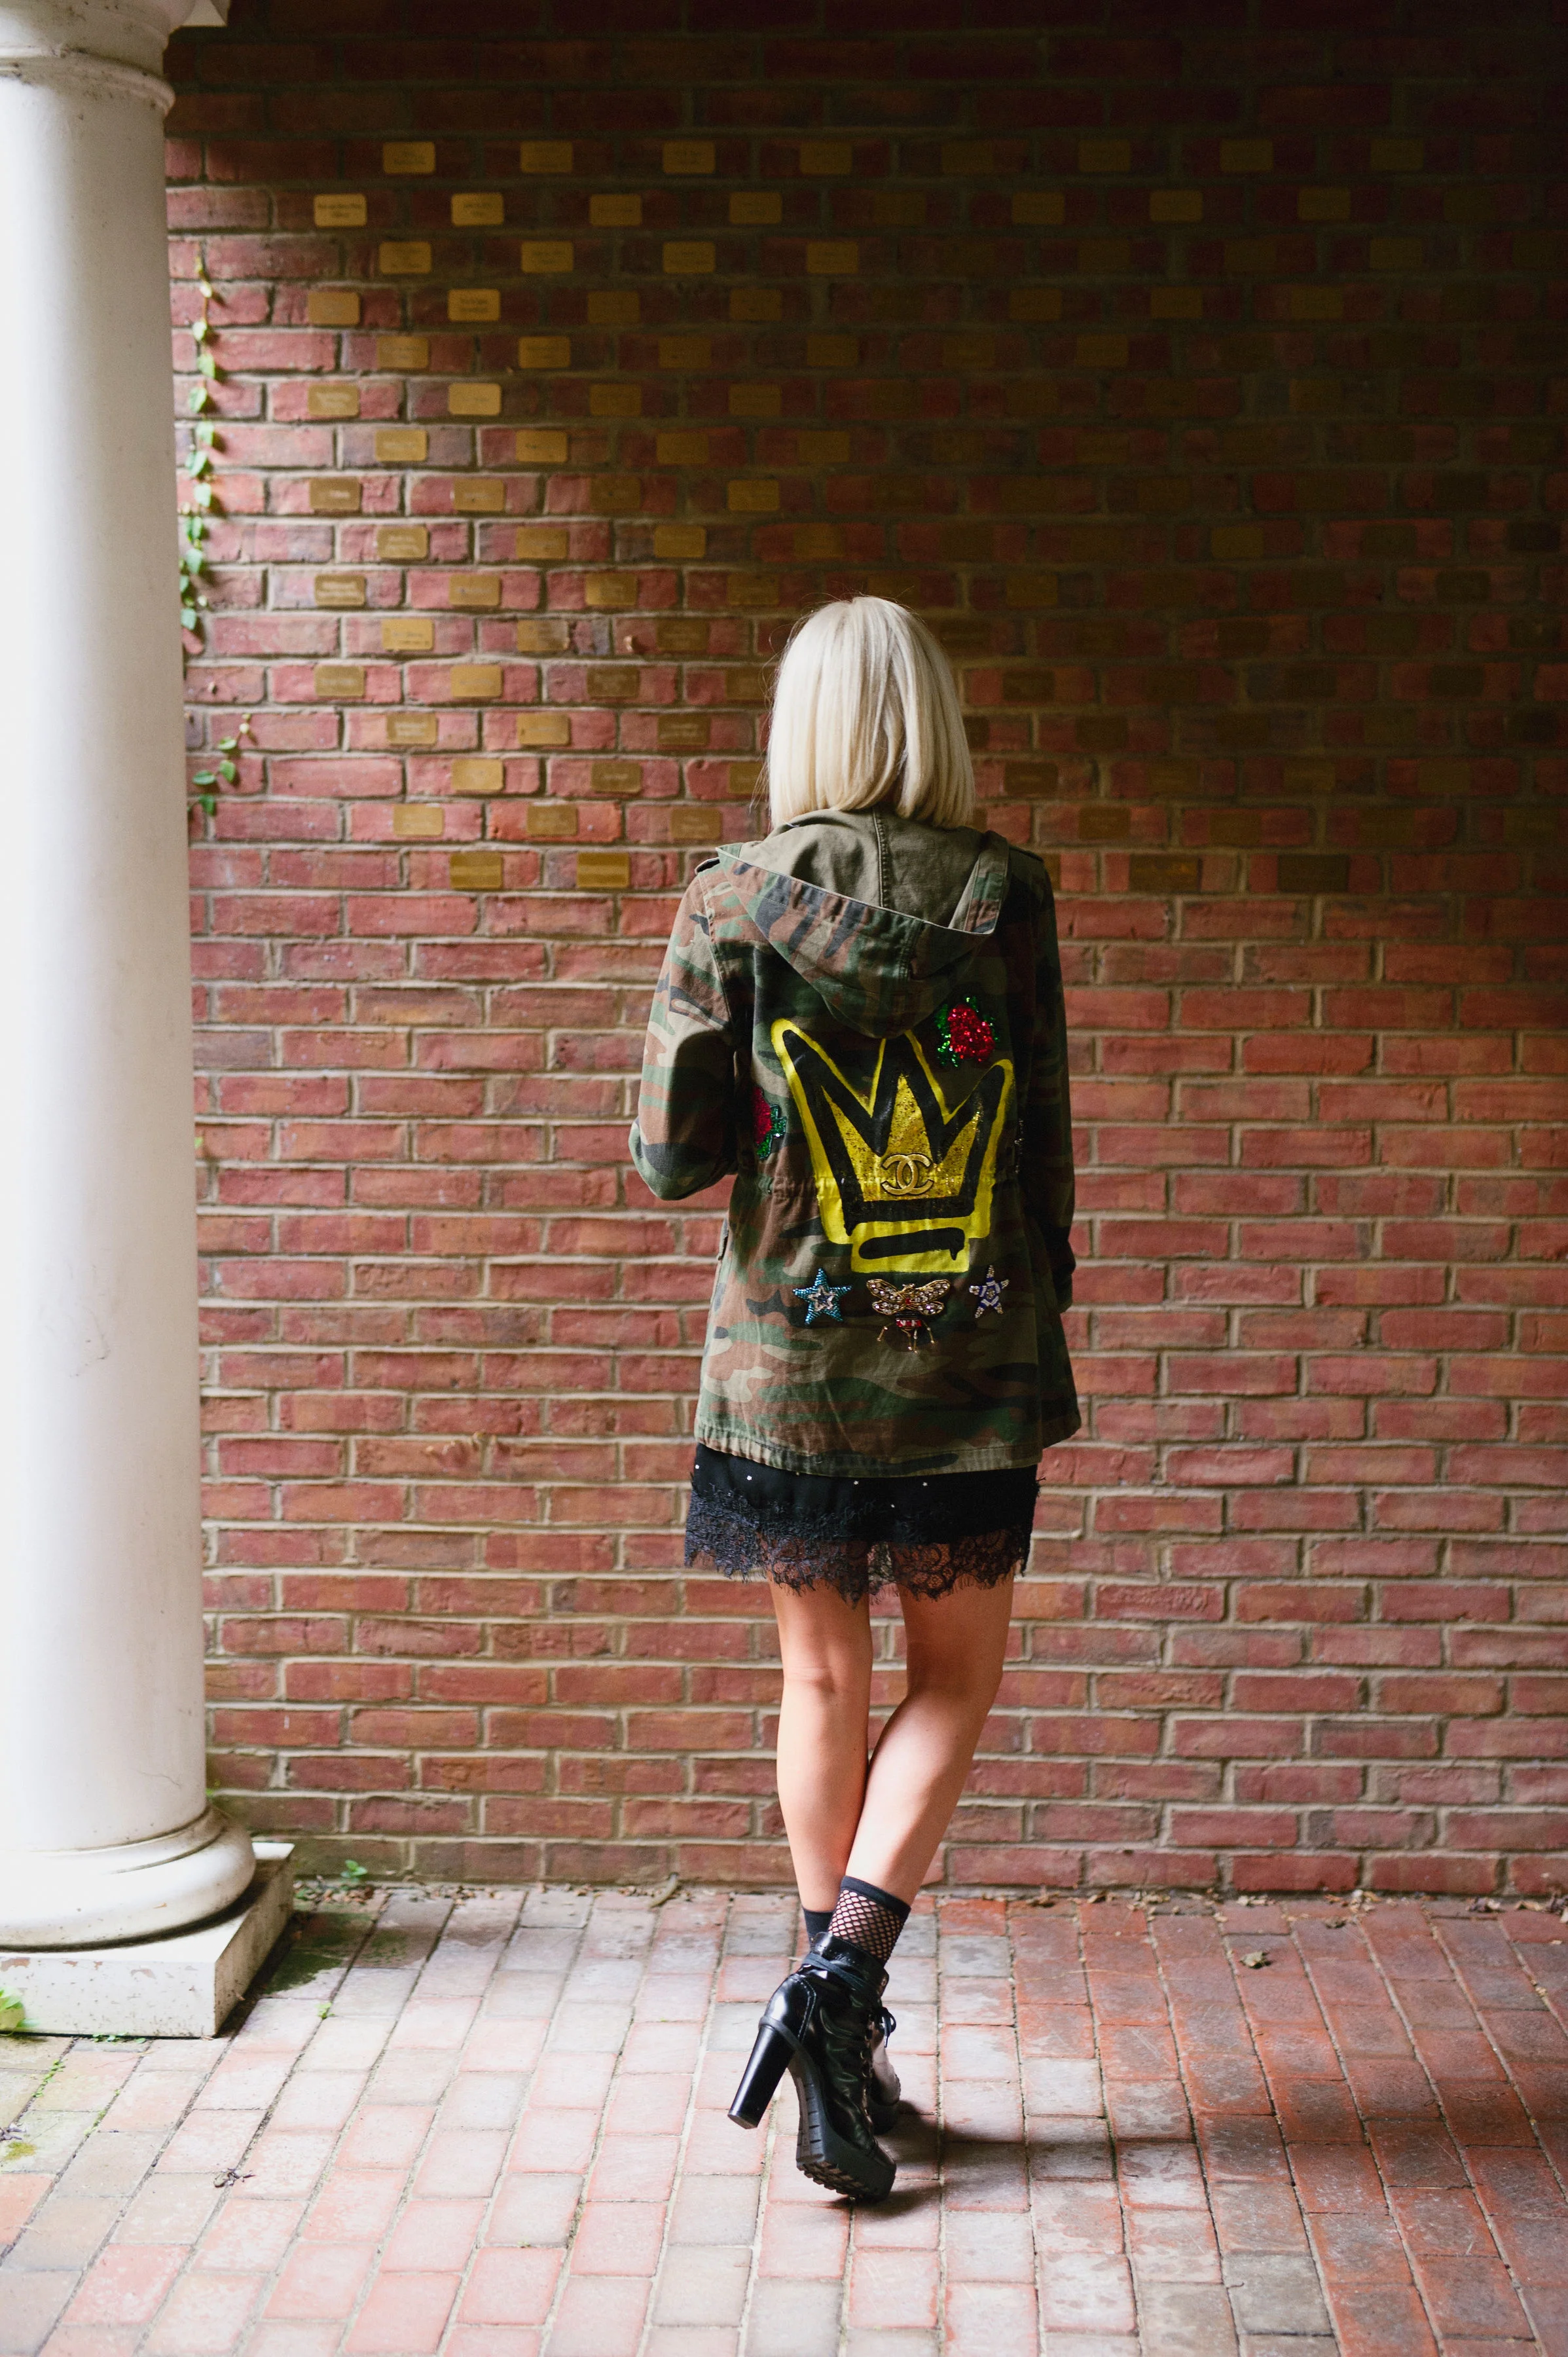


I also included a few patches on the front pocket so the design flowed from front to back.

Also, if you look close you’ll notice the small print on my dress is stars.
This dress can be found at the Lexington fab’rik, as well as a ROCKING star leather jacket they just got in recently.

So gather someone you love and create some memories and a jacket that’ll make your heart smile when you go to wear it.
Until next time…
being you rocks!
Lyv
SHOP

DAILY VIBES


